As bloggers, we work very hard trying to make our blogs unique and one way we do that is with the images that we take and use for our posts. What's aggravating is when all this hard work is "right clicked" away. To reduce and deter the casual viewer from simply right clicking and copying your images, here is a way to disable that feature. Please note that there are ways around this, so for the savvy user, they can still grab your image.
Unfortunately, I am currently only working on the blogger platform, but if you are a wordpress blogger, try the link below. Let me know if it works. If not, I will look for a solution.
For Wordpress, I suggest trying this plugin No Right Click Images Plugin
For Blogger users, follow the steps below.
1. Copy this code
<script language=javascript>
<!--
var message="This function is NOT allowed!";
///////////////////////////////////
function clickIE4(){
if (event.button==2){
alert(message);
return false;
}
}
function clickNS4(e){
if (document.layers||document.getElementById&&!document.all){
if (e.which==2||e.which==3){
alert(message);
return false;
}
}
}
if (document.layers){
document.captureEvents(Event.MOUSEDOWN);
document.onmousedown=clickNS4;
}
else if (document.all&&!document.getElementById){
document.onmousedown=clickIE4;
}
document.oncontextmenu=new Function("alert(message);return false")
// -->
</script>
<!--
var message="This function is NOT allowed!";
///////////////////////////////////
function clickIE4(){
if (event.button==2){
alert(message);
return false;
}
}
function clickNS4(e){
if (document.layers||document.getElementById&&!document.all){
if (e.which==2||e.which==3){
alert(message);
return false;
}
}
}
if (document.layers){
document.captureEvents(Event.MOUSEDOWN);
document.onmousedown=clickNS4;
}
else if (document.all&&!document.getElementById){
document.onmousedown=clickIE4;
}
document.oncontextmenu=new Function("alert(message);return false")
// -->
</script>
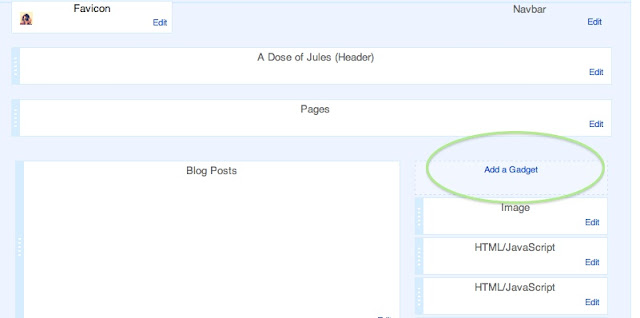
2. Go to Layout and click on Add a Gadget
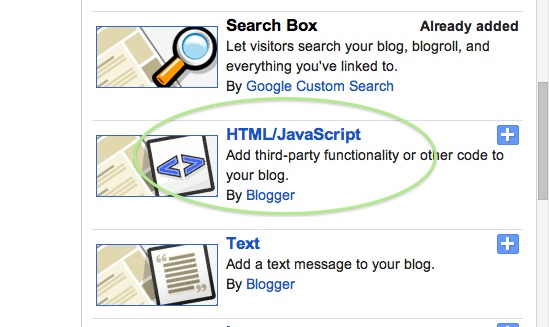
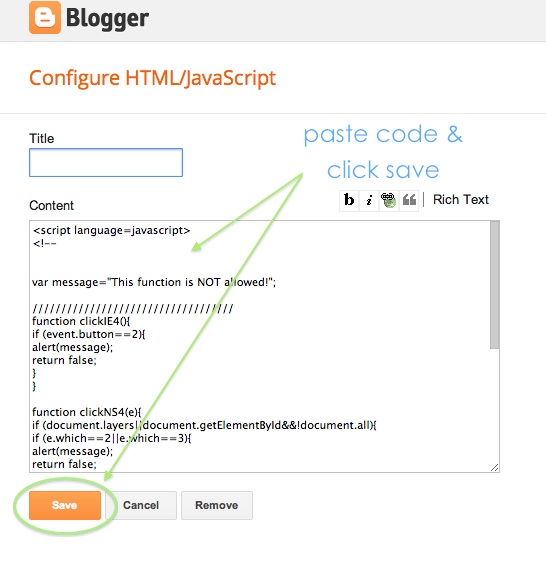
3. Choose the HTML/JavaScript option
4. Paste the code and save
You may also want to disable the image enlargement feature.
I hope this is helpful. Please let me know if you have any questions. I am eager to learn and help fellow bloggers.
Please let me know if this works for you. I did this awhile back, so I may be forgetting something.